

The grille of an HVAC system is more than just a functional component; it’s a visual element that can significantly impact the aesthetic of any space. Their design and condition can affect both air quality and flow efficiency. An outdated grille can detract from your space’s overall look, while a stylish, modern grille can complement and enhance your home or office décor.
This guide is designed to empower you with all the knowledge and steps necessary to successfully change your HVAC grille from an older version to a contemporary style. Whether you’re a DIY enthusiast or a homeowner looking to update your living space, this journey will enhance both the functionality and aesthetics of your HVAC system.
Let’s take a look at a video for reference
Normal steps are as below:
- Preparing for the Upgrade
- Removing the Old Grille
- Choosing the Right New Style Grille
- Installation of the New Grille
Below with one details comprehensive guide, we will walk you through the process of upgrading an older grille to a new, modern style, enhancing both the efficiency and the appearance of your HVAC system.
Understanding HVAC Grilles
Understanding the fundamental aspects of HVAC grilles sets the foundation for making informed decisions about upgrading to a new style. This knowledge is crucial in selecting a grille that not only functions efficiently but also aligns with your aesthetic preferences.
What Are HVAC Grilles?
- Functional and Aesthetic Components:
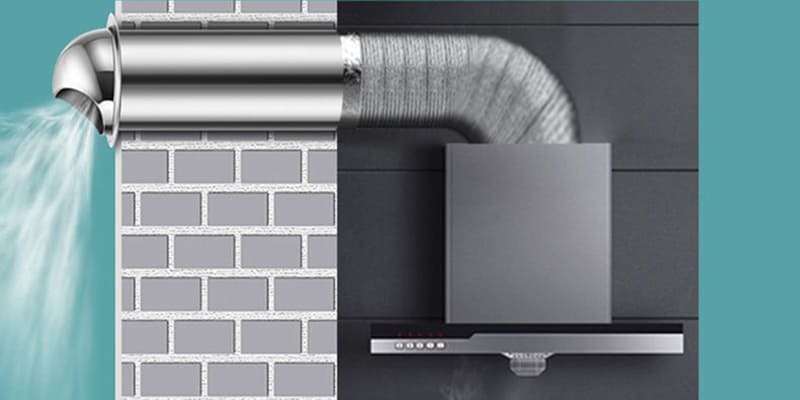
- Definition and Purpose: HVAC grilles are the vent covers that protect the duct openings in your heating, ventilation, and air conditioning system. They play a crucial role in controlling and directing airflow, ensuring efficient distribution throughout the space.
- Design Elements: Besides functionality, grilles also serve an aesthetic purpose, blending with or enhancing the room’s interior design.
The Role of Grilles in HVAC Systems
- Crucial for Efficiency and Air Quality:
- Airflow Management: Grilles help manage airflow, contributing to the HVAC system’s efficiency. Their design can impact how air is distributed, affecting both comfort and energy consumption.
- Protection and Filtration: They protect the ductwork from dust and debris and, depending on their design, can also aid in filtering the air.
Evolution of Grille Designs
- From Functional to Stylish:
- Historical Designs: Traditionally, HVAC grilles were purely functional, with limited attention to aesthetics. Early designs were often basic and utilitarian.
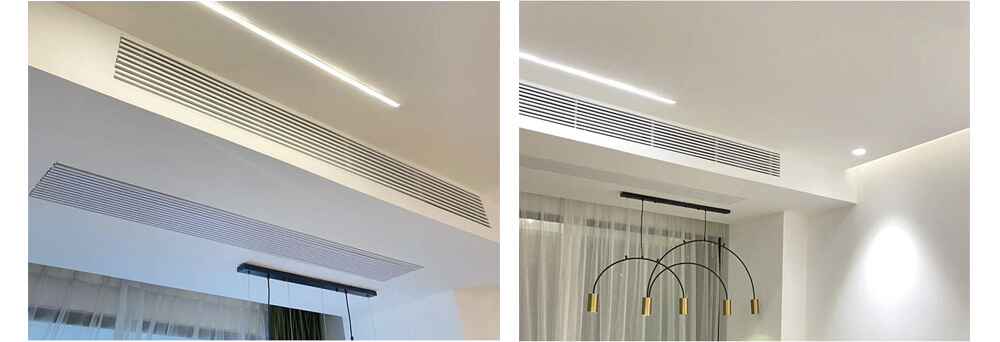
- Modern Aesthetic Trends: Today, grilles have evolved to become design elements in their own right, with a wide range of styles, materials, and finishes that can complement any décor.
The Benefits of Upgrading Your Grille
Embracing a grille upgrade not only revitalizes the look of your space but can also bring several practical benefits:
- Improved Airflow Efficiency: Modern grilles are often designed with efficiency in mind, promoting better air circulation and system performance.
- Enhanced Indoor Air Quality: A new grille can help improve indoor air quality, especially if the old one is damaged or overly restrictive.
- Updated Aesthetic Appeal: The vast array of styles available in today’s market allows you to choose a grille that perfectly matches your interior design preferences.
1. Preparing for the Upgrade
Before diving into the actual process of replacing your old HVAC grille with a new style, proper preparation is key. This section outlines the essential steps and considerations to ensure a smooth and efficient upgrade process.
Gathering Necessary Tools and Materials
- Essential Items for the Upgrade:
- Tools: Common tools needed may include a screwdriver, measuring tape, level, drill, and possibly a saw if adjustments to the opening are required.
- New Grille: Ensure you have purchased the new grille, considering the correct size, style, and compatibility with your HVAC system.
Measuring for the New Grille
- Accuracy Is Key:
- Taking Precise Measurements: Measure the duct opening accurately to ensure the new grille will fit perfectly. Record both the height and width, and note if any unique shape or size considerations are needed.
- Checking for Compatibility: Make sure the new grille’s dimensions align with your current system’s setup, including the duct opening and any fastening points.
Safety Precautions
- Ensuring a Safe Upgrade Process:
- Turn Off the HVAC System: Always start by turning off your HVAC system to prevent any airflow or accidental system activation while working.
- Use Protective Gear: Depending on the tools and nature of work, use appropriate safety gear like gloves and safety glasses.
Initial Steps Before Starting Installation
- Setting the Stage for Installation:
- Clear the Area: Ensure the area around the grille is clear of furniture, decorations, or any obstructions.
- Clean the Duct Opening: Once the old grille is removed, clean the duct opening to remove any dust or debris before installing the new grille.
Preparation: The First Step to a Successful Grille Replacement
By thoroughly preparing for the grille replacement process, you set the stage for a successful and efficient upgrade. Taking the time to gather the right tools, measure accurately, and follow safety precautions will make the installation process smoother and more straightforward.
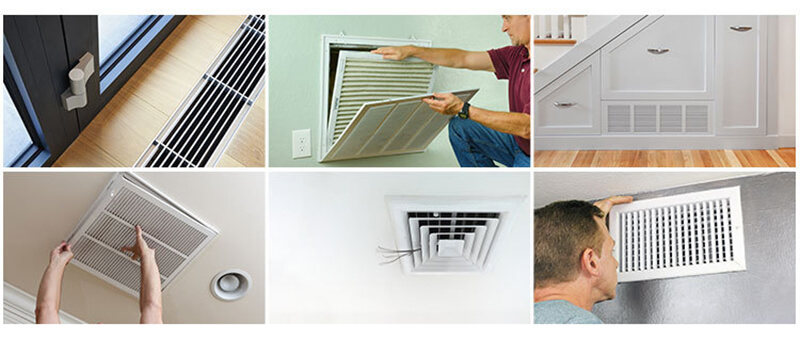
2. Removing the Old Grille
The first physical step in upgrading your HVAC grille is to remove the old one. This process needs to be done carefully to avoid damaging the existing HVAC infrastructure. Here’s how to approach it effectively.
Step-by-Step Process for Grille Removal
- Methodical Approach for Safe Removal:
- Inspect the Grille Attachment: Determine how the old grille is attached to the wall or duct. Common methods include screws, clips, or simply a friction fit.
- Loosen and Remove Fasteners: If screws are present, use the appropriate screwdriver to gently remove them. For clips or friction fit, carefully pry the grille away from the surface.
- Handle with Care: Be cautious as old grilles, especially metal ones, may have sharp edges or corners.
Handling Common Challenges
- Overcoming Potential Removal Obstacles:
- Stuck Screws: If screws are rusted or stuck, apply a penetrating oil and allow it to soak in before attempting removal again.
- Painted-Over Grilles: For grilles that have been painted over, gently score around the edges with a utility knife to break the paint seal.
Disposal or Recycling of the Old Grille
- Environmentally Responsible Disposal:
- Check for Recyclability: Metal grilles can often be recycled. Check with your local recycling guidelines to dispose of the old grille responsibly.
- Consider Repurposing: Think creatively about repurposing the old grille, especially if it’s a unique or decorative piece.
Preparing the Space for the New Grille
- Ensuring a Clean and Ready Area:
- Clean the Duct Opening: Once the old grille is removed, clean around the duct opening to ensure a dust-free surface for the new installation.
- Inspect for Damage: Check the area for any damage or irregularities that might affect the installation of the new grille.
Smoothly Transitioning to Your New HVAC Grille
Properly removing the old grille is an essential step in ensuring that your new grille can be installed efficiently and effectively. Taking the time to do this carefully lays the groundwork for a successful upgrade.
3. Choosing the Right New Style Grille
Choosing the right new style grille is more than a functional decision; it’s also an opportunity to upgrade the look and feel of your space. This section will guide you through the key factors to consider when selecting a new grille for your HVAC system.
Understanding Your Needs and Preferences
- Balancing Function with Style:
- Assess Your HVAC Requirements: Consider the airflow needs of your space and ensure the new grille can accommodate these requirements.
- Personal Style and Interior Decor: Choose a grille style that complements the existing decor of your home or office, whether you’re looking for a modern, sleek look or a classic, decorative style.
Factors to Consider in Grille Selection
- Critical Considerations for the Best Fit:
- Size and Fit: Ensure the new grille matches the size of your existing duct opening to guarantee a seamless fit.
- Material Choices: Decide between materials like aluminum, steel, or wood, each offering different aesthetic appeals and durability levels.
- Airflow Design: Consider the design of the grille and how it will affect air distribution in your space.
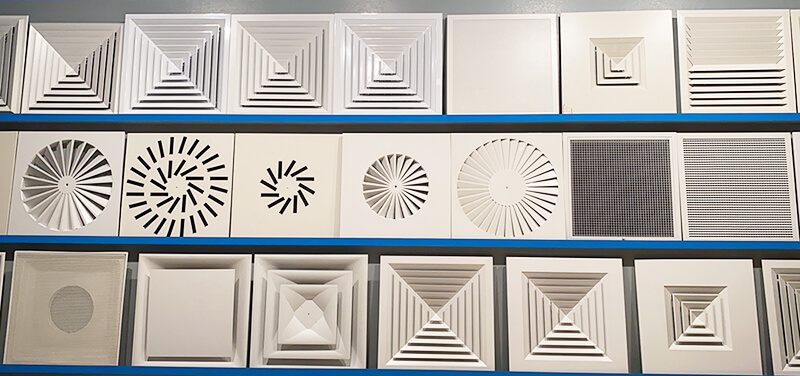
Popular Modern Grille Styles
- Exploring Contemporary Options:
- Minimalist Designs: For a modern, clean look, minimalist grilles with simple lines and unobtrusive designs are popular.
- Decorative Patterns: If adding a design element is your goal, explore grilles with decorative patterns or ornate features.
- Custom Options: For unique spaces, custom grille designs might be the best solution to match specific interior styles or dimensions.
Recommendations Based on HVAC Setups
- Tailoring Choices to Specific Systems:
- Standard Residential Systems: For typical home HVAC systems, a balance of efficiency and design is often desired.
- Commercial HVAC Systems: In commercial settings, durability and airflow capacity might be the top priorities, along with a design that fits the professional ambiance.
Making an Informed Decision for Your HVAC Grille Upgrade
Selecting the right new style grille involves considering both the functional aspects of your HVAC system and the aesthetic impact on your space. With the right balance, your new grille can not only enhance the efficiency of your system but also contribute significantly to the overall aesthetic of your environment.

4. Installation of the New Grille
Once you’ve chosen the perfect new grille for your HVAC system, the next step is installation. This section outlines the process for installing your new grille, ensuring it’s done correctly and efficiently.
Preparing for Installation
- Setting the Stage for a Smooth Process:
- Gather Your Tools: Depending on the grille and installation type, you may need a screwdriver, drill, level, and possibly anchors or other hardware.
- Prepare the Area: Make sure the workspace is clear and the duct opening is clean and free of debris.
Step-by-Step Installation Guide
- Detailed Instructions for Effective Installation:
- Test Fit the Grille: Before securing it, place the grille in the opening to ensure a proper fit.
- Align and Level: Carefully align the grille, ensuring it’s level and positioned correctly for optimal airflow and aesthetic appearance.
- Secure the Grille: Depending on the attachment method (screws, clips, or friction fit), securely attach the grille to the duct opening. If drilling is required, mark the screw holes, drill pilot holes, and then attach the grille with screws.
- Final Adjustments: Once secured, make any necessary adjustments to ensure the grille is flush and evenly placed.
Troubleshooting Installation Issues
- Overcoming Common Installation Challenges:
- Misaligned Grille: If the grille isn’t sitting flush, check for obstructions or uneven surfaces and adjust accordingly.
- Loose Fit: If the grille feels loose, ensure all fasteners are tightened properly, or use appropriate anchors for a more secure fit.
Ensuring Proper Airflow
- Final Checks for System Efficiency:
- Airflow Testing: Once installed, turn on your HVAC system and observe the airflow to ensure there are no obstructions or issues.
- Adjustment of Louvers: If your grille has adjustable louvers, set them to the desired angle for optimal air distribution.
Achieving a Successful Grille Upgrade
By following these installation steps, you can successfully install your new HVAC grille, enhancing both the functionality and aesthetic appeal of your system. Proper installation ensures that your grille not only looks great but also contributes to the efficient operation of your HVAC system.
Post-Installation Considerations
After successfully installing your new HVAC grille, there are important considerations to ensure its optimal performance and longevity. This section covers the necessary steps and checks to make post-installation.
Ensuring Proper Airflow and System Balance
- Fine-Tuning for Efficiency:
- Assess Airflow: After installation, it’s crucial to check that the new grille allows for proper airflow. Observe if there are any noticeable changes in air distribution or system efficiency.
- Balance the System: Make sure that the installation of the new grille hasn’t disrupted the balance of your HVAC system. Inconsistent room temperatures can be a sign of airflow imbalance.
Maintenance Tips for Your New Grille
- Keeping Your Grille in Top Condition:
- Regular Cleaning: Dust and debris can accumulate on grilles, reducing efficiency. Clean your grill regularly to maintain unobstructed airflow.
- Inspection for Wear and Tear: Periodically inspect the grille for any signs of damage or wear that could impact its functionality or appearance.
When to Seek Professional Help
- Understanding the Limits of DIY:
- Complex Issues: If you encounter problems with airflow or system balance that you can’t resolve, it might be time to consult with an HVAC professional.
- Regular System Check-ups: Even with a successful grille installation, it’s a good practice to have your HVAC system professionally inspected and serviced regularly.
The Role of Grilles in Indoor Air Quality
- Contributing to a Healthier Environment:
- Air Quality Considerations: A well-installed grille not only enhances system efficiency but can also play a role in maintaining good indoor air quality.
- Consider Upgrades: If indoor air quality is a concern, consider additional upgrades like filters or purifiers that can work in conjunction with your HVAC system and a new grille.
Maximizing the Benefits of Your Grille Upgrade
The completion of your grille installation marks the beginning of an ongoing process of maintenance and care. By paying attention to these post-installation considerations, you can ensure that your new grille continues to enhance both the aesthetics and functionality of your HVAC system for years to come.

Additional Tips for HVAC Aesthetics and Efficiency
Upgrading your HVAC grille is just one step towards enhancing the aesthetics and efficiency of your system. This section offers additional tips and ideas for further improving both the visual appeal and functionality of your HVAC setup.
Integrating HVAC with Interior Design
- Harmonizing Function and Style:
- Color Coordination: Consider painting or choosing grilles and vents that complement or contrast with your room’s color scheme for added visual interest.
- Custom Design Elements: Explore custom grille designs or decorative covers that can serve as a focal point or blend seamlessly with your interior decor.
Improving Efficiency Through Smart Controls
- Leveraging Technology for Enhanced Performance:
- Smart Thermostats: Install a smart thermostat to gain better control over your HVAC system, leading to increased energy efficiency and comfort.
- Automated Systems: Consider upgrading to automated systems that adjust airflow based on room occupancy or time of day for optimal efficiency.
Upgrading Other HVAC Components
- Comprehensive System Enhancement:
- Energy-Efficient Upgrades: Look into upgrading other parts of your HVAC system, such as energy-efficient motors or advanced filtration systems, to improve overall performance.
- Ductwork Inspection: Regularly inspect and maintain your ductwork to ensure there are no leaks or blockages that could affect system efficiency.
Incorporating Eco-Friendly Practices
- Adopting Sustainable HVAC Solutions:
- Use of Eco-Friendly Materials: When possible, choose materials and components that are environmentally friendly and sustainable.
- Regular System Maintenance: Keep your HVAC system well-maintained to ensure it operates at peak efficiency, reducing its environmental impact.
Elevating Your HVAC Experience
By considering these additional aesthetic and efficiency tips, you can further enhance the comfort, functionality, and appearance of your home or office HVAC system. These improvements not only contribute to a more pleasant and efficient environment but can also offer long-term cost savings and sustainability benefits.
Common Mistakes to Avoid
When upgrading your HVAC grille, certain pitfalls can lead to inefficiencies or aesthetic discrepancies. This section highlights common mistakes to be aware of and how to avoid them.
Incorrect Measurement and Size Matching
- Ensuring Proper Fit and Functionality:
- Mistake: Not Measuring Accurately: One of the most common errors is failing to measure the grille opening accurately, leading to a mismatch in size and improper fitting.
- Solution: Double-Check Measurements: Always measure the grille opening more than once for accuracy and compare it with the specifications of the new grille before purchase.
Overlooking Aesthetic Integration
- Balancing Style with Function:
- Mistake: Ignoring Interior Design Elements: Selecting a grille that clashes with the room’s decor can detract from the overall aesthetic appeal.
- Solution: Consider the Room’s Style: Choose a grille that complements or enhances the existing interior design, ensuring it blends well with the surrounding elements.
Neglecting System Compatibility
- Harmonizing Grille with HVAC System:
- Mistake: Overlooking System Requirements: Installing a grille that is not compatible with the HVAC system can lead to airflow issues or inefficiencies.
- Solution: Verify Compatibility: Ensure that the new grille is suitable for your HVAC system, considering factors like airflow requirements and system capacity.
Skipping Post-Installation Checks
- Finalizing Installation with Assurance:
- Mistake: Not Performing Final Checks: Failing to check for proper airflow and system balance after installation can lead to long-term issues.
- Solution: Conduct a Thorough Inspection: After installing the new grille, test the system to ensure everything is functioning correctly and make any necessary adjustments.
Avoiding Common HVAC Grille Upgrade Mistakes
By being aware of these common mistakes and taking steps to avoid them, you can ensure a successful grille upgrade, enhancing both the efficiency and aesthetics of your HVAC system.
Conclusion
As we conclude our guide on upgrading an older grille to a new style in HVAC systems, we hope you feel equipped and inspired to undertake this transformative project. The conclusion summarizes key takeaways and encourages proactive engagement in HVAC maintenance.
Emphasizing the Benefits of a Grille Upgrade
- A Fusion of Functionality and Style:
- Enhanced Aesthetics: The switch to a modern grille style not only enhances the look of your space but also reflects your style and attention to detail.
- Improved HVAC Efficiency: A well-chosen and correctly installed grille can contribute to better airflow and system efficiency.
Reflecting on the Upgrade Process
- Journey from Planning to Completion:
- Careful Preparation: Remember that successful grille replacement begins with thoughtful preparation, accurate measurements, and choosing the right style and size.
- Meticulous Installation: The detailed steps for removing the old grille and installing the new one are crucial for ensuring a seamless and efficient upgrade.
Encouragement for Continuous HVAC Care
- Maintaining System Health Beyond the Grille:
- Regular Maintenance: Continuously care for your HVAC system, including regular cleaning and professional check-ups, to maintain its optimal performance.
- Staying Informed: Keep abreast of new trends and technologies in HVAC design and maintenance to further enhance your system in the future.
Your Role in Transforming Your Living Space
Upgrading your HVAC grille is more than a mere maintenance task; it’s an opportunity to reinvent a part of your living or working space. By following this guide and embracing the process, you can make a significant impact on both the efficiency and aesthetics of your environment.
FAQs: Changing an Older Grille to a New Style Grille in HVAC
Q1: How Do I Know What Size Grille to Purchase?
A1: Determining the Correct Grille Size:
- Measuring Accurately: Measure the opening of your current grille (both height and width) to determine the size of the new grille you need to purchase. Always measure twice for accuracy.
Q2: Can I Install a New Grille Myself, or Do I Need a Professional?
A2: DIY vs. Professional Installation:
- Assessing Skill Level: Many grille replacements can be done DIY with basic tools. However, if you’re uncomfortable with the process or if the installation requires significant modifications, it’s wise to hire a professional.
Q3: What Are the Latest Trends in HVAC Grille Designs?
A3: Keeping Up with Contemporary Styles:
- Modern Design Trends: Current trends include minimalist designs, decorative patterns, and custom-made grilles that align with specific interior decor themes.
Q4: Are There Any Specific Tools Required for Grille Replacement?
A4: Essential Tools for the Job:
- Basic Toolkit: Common tools needed for grille replacement include a screwdriver, measuring tape, level, and potentially a drill, depending on the installation method.
Q5: How Can I Ensure the New Grille Matches My Room’s Aesthetics?
A5: Harmonizing Grille with Interior Design:
- Style Consideration: Choose a grille that complements or enhances your room’s style. Consider the color, material, and design pattern of the grille for your interior decor.
If you want to know more, please click below:
- HVAC Linear Slot Diffusers – The Ultimate Guide
- HVAC Egg Crate Diffuser – The Ultimate Guide
- HVAC Jet Nozzle Diffuser – The Ultimate Guide
- HVAC Linear Bar Grilles – The Ultimate Guide
- HVAC Air Swirl Diffusers – The Ultimate Guide
- HVAC Round Ceiling Diffusers – The Ultimate Guide
- Round Ceiling Diffusers – The Ultimate Guide
- HVAC Return Air Grille – The Ultimate Guide
- Exhaust Air Louver – The Ultimate Guide
- HVAC Registers – The Ultimate Guide