
Return grille diffusers are more than mere components; they are the unsung heroes of HVAC systems. In this section, we delve into what these diffusers are, their function, and the different types available, providing a foundation for understanding their significance in the HVAC ecosystem.
Defining Return Grille Diffusers
- Essential Function: A return grille diffuser’s primary role is to facilitate the movement of air back into the HVAC system. It’s crucial for maintaining consistent air circulation, temperature, and quality.
- Design Aspects: Typically, these diffusers are designed with slats or louvers, which aid in directing airflow efficiently and reducing noise.
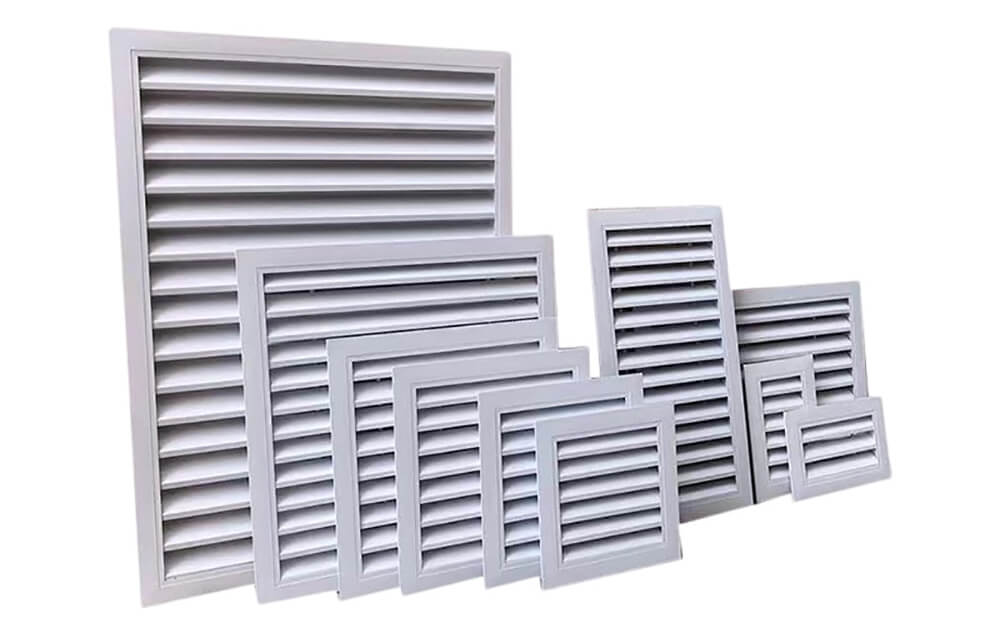
Types of Return Grille Diffusers
- Standard Grilles: These are commonly found in residential and commercial buildings, characterized by their simple, functional design.
- Decorative Grilles: For those who value aesthetics along with functionality, decorative grilles come in various styles and patterns, adding an element of decor to the space.
- Custom Options: Custom grille diffusers can be designed to fit unique spaces or specific airflow requirements, offering tailored solutions for challenging installations.
Understanding Their Role in HVAC Systems
- Air Quality and Comfort: By effectively recirculating air, return grille diffusers contribute significantly to maintaining indoor air quality and thermal comfort.
- Energy Efficiency: Properly designed and installed diffusers can enhance the energy efficiency of the system by ensuring optimal airflow and reducing the workload on HVAC units.
Aiming for Perfection in Cutting and Installation
- The Key to Efficiency: Precision in cutting and fitting a return grille diffuser is not just about aesthetics; it’s about maximizing the efficiency of the entire HVAC system.
- Skill Enhancement: Through this guide, you will acquire skills that go beyond basic DIY, enhancing your ability to undertake more complex and rewarding projects in HVAC system maintenance and improvement.
Tools and Materials Needed
Embarking on the task of cutting a return grille diffuser requires not only skill but also the right set of tools and materials. This section outlines the essential equipment and materials you’ll need to ensure a successful and precise cut.
Essential Tools for the Task
- Measuring Tape: Precision starts with accurate measurement. A reliable measuring tape is indispensable for ensuring the grille fits perfectly.
- Metal Saw or Cutter: Depending on the material of your grille, a high-quality metal saw or cutter is required for clean and accurate cuts.
- Drill: A drill may be necessary for pre-drilling holes or making initial cuts, especially in tougher materials.
- Files and Sandpaper: After cutting, you’ll need files and sandpaper for smoothing out edges and ensuring a professional finish.
Choosing the Right Materials
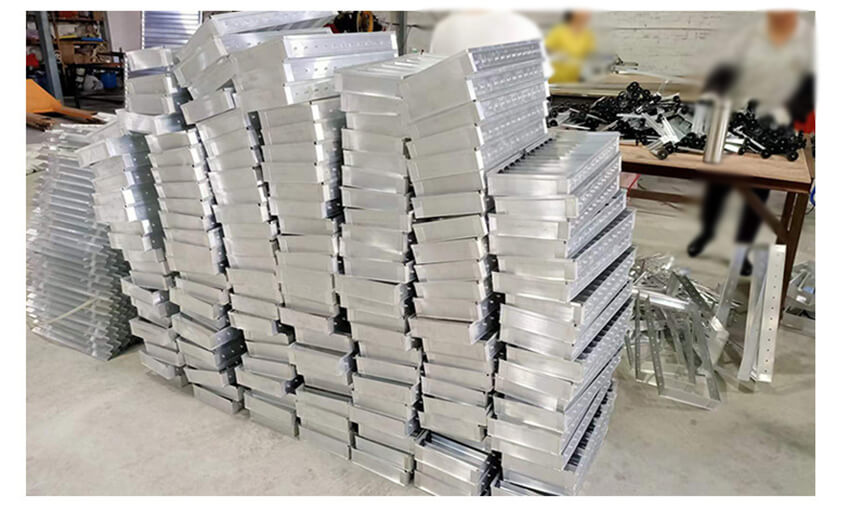
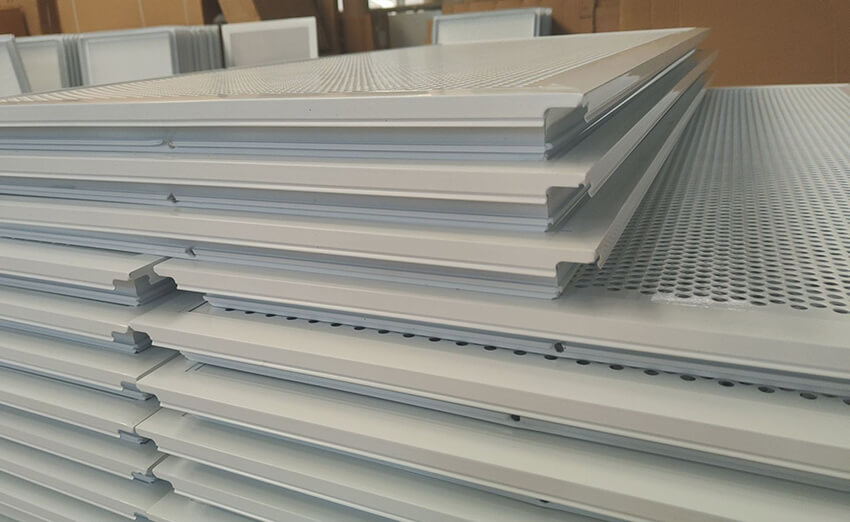
- Grille Material Selection: Common materials for grilles include aluminum, steel, and wood. Your choice should be influenced by both aesthetic preference and functional requirements.
- Thickness Considerations: The thickness of the material can affect both the ease of cutting and the final installation. Ensure the thickness is compatible with your HVAC system and installation space.
Safety Equipment: A Must-Have
- Protective Gloves: To prevent cuts and abrasions, wear protective gloves when handling and cutting grille materials.
- Safety Goggles: Metal or wood shavings can be hazardous. Safety goggles are essential to protect your eyes during the cutting process.
- Ear Protection: If using power tools, ear protection can help prevent hearing damage from prolonged noise exposure.
Preparing for the Cut
Before diving into the actual cutting process, proper preparation is crucial. This section guides you through the essential steps of preparing for the cut, ensuring accuracy and efficiency in your work.
Measuring and Marking: The Foundation of Precision
- Accurate Measurements: Begin by meticulously measuring the area where the grille will be installed. Precision here is key to ensuring a perfect fit.
- Marking the Material: Once measurements are taken, use a marker or chalk to outline the cut on the grille material. A clear, visible line is your guide to an accurate cut.
Understanding Airflow Requirements
- Airflow Analysis: It’s crucial to understand the airflow requirements of your space. The size and design of the cut should facilitate adequate air movement for efficient HVAC functioning.
- Consulting HVAC Specifications: Refer to your HVAC system’s specifications to determine the optimal size and placement of the grille for effective air return.
Setting Up Your Workspace
- Choosing the Right Environment: A well-lit, spacious, and stable workspace is essential. Ensure you have enough room to maneuver and handle materials safely.
- Securing the Material: Use clamps or a vise to securely fasten the grille material. This stability is vital for a controlled and safe cutting process.
- Organizing Tools and Equipment: Have all your tools within reach. A well-organized workspace leads to a smoother and more efficient cutting process.
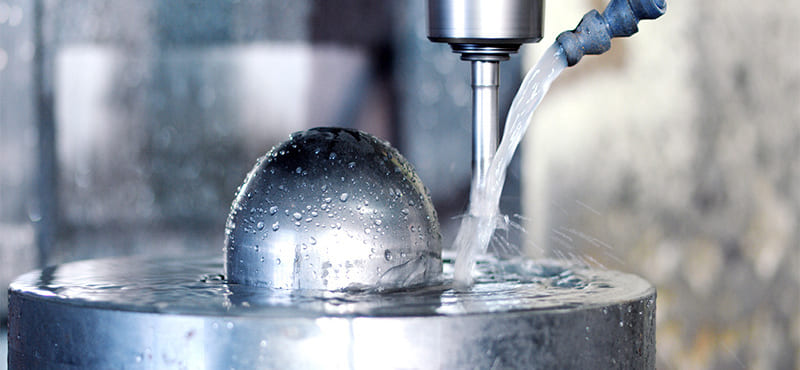
The Cutting Process
The cutting process is the most critical step in preparing your return grille diffuser. This section walks you through each stage of the cutting process, ensuring precision and safety.
Let’s take a look at a video for reference
Initiating the Cut: Starting on the Right Note
- Begin with a Pilot Cut: Initiate the cutting process by making a small pilot cut. This initial incision guides the rest of your cutting, ensuring accuracy right from the start.
- Use the Right Tools: Depending on your grille material, select the appropriate cutting tool. For metal grilles, a metal saw or cutter is ideal, while wood materials may require a different approach.
Step-by-Step Cutting Guide
- Follow Your Markings: Carefully cut along the lines you’ve marked, maintaining steady pressure and control. Ensure your cuts are straight and adhere closely to the outline.
- Take Your Time: Rushing the process can lead to mistakes. A slow, deliberate approach ensures a cleaner and more accurate cut.
- Regularly Check Measurements: Periodically pause to re-measure and ensure that your cut remains aligned with your initial markings.
Refining and Finishing the Cut
- Smoothing Edges: Once the cut is complete, use files and sandpaper to smooth any rough edges. This step is crucial for both safety and aesthetics.
- Final Fitting: Test fit the grille in its designated space. If any adjustments are needed, carefully trim or file down the edges for a perfect fit.
- Cleaning Up: Remove any debris or filings from the grille and the workspace. A clean finish is essential for both the functionality and look of the grille.
Installation and Finishing Touches
After cutting the return grille diffuser to perfection, the next crucial phase is installation and adding finishing touches. This section guides you through a seamless installation process and how to give your project the professional finish it deserves.
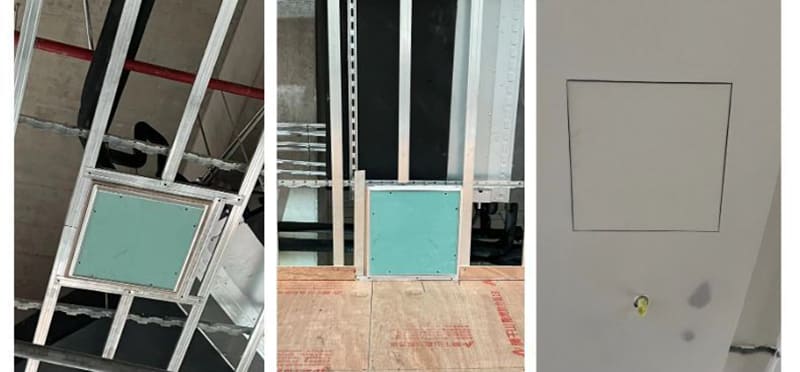
Fitting the Grille Diffuser: Ensuring a Seamless Install
- Test Fitting: Before securing the grille, conduct a test fit to ensure it sits flush and evenly in its designated space. Any minor discrepancies should be adjusted at this stage.
- Securing the Grille: Once satisfied with the fit, use appropriate screws or fasteners to securely attach the grille to the duct opening. This should be done evenly to avoid warping or bending.
Sealing and Ensuring Durability
- Sealant Application: To prevent air leaks, apply a high-quality sealant around the edges of the grille. This step is crucial for maintaining energy efficiency in your HVAC system.
- Checking for Air Leaks: After installation, check for any potential air leaks and address them immediately. A well-sealed grille improves overall system performance.
Aesthetic Enhancement and Final Touches
- Painting or Finishing: If necessary, apply a coat of paint or finish to match the grille with your room’s decor. Ensure the paint is appropriate for the material of your grille.
- Clean and Polish: Finally, clean off any debris or fingerprints and give your grille a polish for a professional, sleek appearance.
- Final Inspection: Conduct a thorough inspection to ensure everything is secure, sealed, and aesthetically pleasing. This is your opportunity to make any last-minute tweaks for a flawless finish.
Maintenance and Care
Proper maintenance and care are crucial to ensure your return grille diffuser remains functional and aesthetically pleasing over time. This section provides essential tips and routines to maintain your grille diffuser effectively.
Routine Cleaning: Keeping Your Grille in Top Condition
- Regular Dusting and Cleaning: Regularly wipe down and dust your grille to prevent dust accumulation, which can impede airflow and diminish the system’s efficiency.
- Deep Cleaning Schedule: Plan for a more thorough cleaning periodically. This involves removing the grille and cleaning it with appropriate cleaners to remove grime and debris.
Inspecting for Wear and Damage
- Regular Checks: Periodically inspect the grille for any signs of wear, damage, or corrosion. Early detection of issues can prevent more significant problems down the line.
- Addressing Issues Promptly: If you notice any damage or loosening, address these issues promptly to maintain the grille’s efficiency and appearance.
Long-Term Care Strategies
- Preventive Measures: Implement preventive measures such as using corrosion-resistant finishes or installing filters to protect the grille from environmental factors.
- Professional Assessment: Consider having a professional assess your HVAC system and grille diffuser annually. This can identify potential issues that might not be apparent to the untrained eye.
Adapting to Environmental Changes
- Adjustments for Seasonal Changes: Be aware of how different seasons might affect your grille and HVAC system. Seasonal maintenance can include checking for blockages caused by leaves in the fall or snow in the winter.
- Adapting to Home Renovations: If you undergo home renovations, reassess the grille’s placement and condition to ensure it still meets your home’s airflow needs.
Troubleshooting Common Issues
Even with perfect installation and regular maintenance, you might encounter some common issues with your return grille diffuser. This section is dedicated to identifying and solving these problems, ensuring your HVAC system continues to operate efficiently.
Addressing Reduced Airflow
- Identifying Blockages: One of the most common causes of reduced airflow is blockages. Inspect the grille for any obstructions such as dust accumulation or foreign objects.
- Checking for Proper Alignment: Misalignment during installation can lead to inefficient airflow. Ensure that the grille is properly aligned with the ductwork.
Resolving Unusual Noises
- Tightening Loose Components: Rattling or buzzing noises are often due to loose parts. Check and tighten any loose screws or fittings on the grille.
- Dampening Vibrations: If the grille vibrates, consider adding dampening material around the edges to reduce noise.
Managing Inconsistent Room Temperature
- Assessing Air Distribution: Inconsistent temperatures can be a sign of poor air distribution. Reevaluate the placement and size of your grille to ensure it’s adequately circulating air throughout the room.
- Consulting with Professionals: If the issue persists, it might be worthwhile to consult with an HVAC professional to assess whether there are larger issues at play within your system.
Long-Term Functionality Concerns
- Regular Performance Checks: Conduct regular checks to ensure the grille is performing as expected. Look for signs of wear or inefficiency.
- Upgrading When Necessary: Over time, your grille may need to be upgraded or replaced. Stay informed about advancements in grille design and materials that could enhance your HVAC system’s efficiency.
Conclusion
As we wrap up this comprehensive guide on cutting and installing a return grille diffuser, it’s important to reflect on the key skills and knowledge acquired. This conclusion revisits the critical aspects of the process and underscores the importance of precision and care in each step.
Emphasizing the Importance of Precision and Care
- Attention to Detail: The journey to a perfect return grille diffuser starts and ends with attention to detail. From accurate measurements to meticulous installation, every step demands focus and precision.
- Quality Over Speed: Remember, taking your time to ensure quality in each step will yield a better result than rushing through the process. A carefully executed job guarantees efficiency and longevity.
The Value of Maintenance and Troubleshooting
- Ongoing Care: The completion of your project is not the end. Regular maintenance and being vigilant about troubleshooting common issues ensure your grille diffuser serves its purpose effectively over time.
- Empowerment Through Knowledge: Armed with the knowledge from this guide, you are now equipped to handle not just the installation but also the long-term care of your return grille diffuser.
Looking Forward to Future Projects
- Building on Your Skills: The skills and knowledge gained here lay a foundation for more advanced HVAC projects. Use this experience as a stepping stone to further enhance your capabilities.
- Continuous Learning: The world of HVAC is dynamic, with continual advancements. Stay curious and open to learning, and you will find that your skills and knowledge continue to grow.
FAQs: Cutting a Perfect Return Grille Diffuser
Selecting the Right Tools and Materials
Q: What are the best tools for cutting metal grille materials?
- A: For metal grilles, a high-quality metal saw or metal snips are recommended for precision and ease. Ensure the tool is sharp and suited for the thickness of the material.
Q: How do I choose the right material for my return grille diffuser?
- A: Consider factors like durability, aesthetics, and the environment (e.g., humidity, temperature) where the grille will be installed. Common materials include aluminum, steel, and sometimes wood.
Perfecting the Cutting Process
Q: How can I ensure my cuts are straight and precise?
- A: Use a straight edge or ruler along with your marking tool to create accurate lines. Take your time during the cutting process, and consider using cutting guides or a miter box for extra precision.
Q: What’s the best way to avoid jagged edges when cutting?
- A: Use sharp, appropriate tools for the material and make steady, controlled cuts. After cutting, smooth the edges with a file or sandpaper to remove any jaggedness.
Installation Tips and Tricks
Q: What are some key tips for ensuring a seamless grille installation?
- A: Ensure that your measurements are accurate, and the cut grille fits snugly in the opening. Use a level during installation to ensure the grille is perfectly horizontal or vertical.
Q: How do I properly seal the grille after installation?
- A: Use a quality sealant around the edges of the grille to prevent air leaks. Apply the sealant evenly and wipe away any excess for a clean finish.
Addressing Common Installation Issues
Q: What should I do if the grille doesn’t fit properly in the opening?
- A: If the grille is too large, carefully trim it down for a better fit. If it’s too small, you may need to adjust the size of the opening or use a grille with a broader border.
Q: How can I reduce noise from my return grille diffuser?
- A: Ensure all components are tightly secured. If noise persists, consider installing dampening material or checking for other issues in the HVAC system.

If you want to know more, please click below:
- HVAC Linear Slot Diffusers – The Ultimate Guide
- HVAC Egg Crate Diffuser – The Ultimate Guide
- HVAC Jet Nozzle Diffuser – The Ultimate Guide
- HVAC Linear Bar Grilles – The Ultimate Guide
- HVAC Air Swirl Diffusers – The Ultimate Guide
- HVAC Round Ceiling Diffusers – The Ultimate Guide
- Round Ceiling Diffusers – The Ultimate Guide
- HVAC Return Air Grille – The Ultimate Guide
- Exhaust Air Louver – The Ultimate Guide
- HVAC Registers – The Ultimate Guide