Mini-split air conditioning units have become a popular choice for both homeowners and businesses seeking efficient and versatile climate control solutions. Unlike traditional HVAC systems, mini-splits offer the convenience of ductless operation, allowing for easier installation and individual room control. However, like all air conditioning systems, regular cleaning and maintenance are essential to ensure they operate efficiently, last longer, and keep the air in your space clean and fresh. This article will guide you through the essential steps to clean your mini-split AC unit properly, ensuring it continues to provide comfort without interruption.
Understanding Your Mini-Split AC Unit
Basic Components and Their Functions
To effectively clean your mini-split AC, it’s crucial to have a basic understanding of its components:
- Indoor Unit: Houses the air filter, evaporator coil, and fan. It’s responsible for distributing cooled air into the room.
- Outdoor Unit: Contains the compressor, condenser coil, and fan. It expels heat from the indoor air outside.
- Remote Control: Allows you to adjust settings, temperature, and modes.
How It Works
The mini-split system operates by transferring heat from inside your home to the outdoors, thanks to a circulating refrigerant. Cleanliness directly impacts its efficiency because dust and debris can hinder heat transfer and airflow.

Signs Your Mini-Split AC Needs Cleaning
Regular cleaning is vital, but how do you know when it’s time? Here are some clear indicators:
- Reduced Cooling Efficiency: If your unit takes longer to cool the room or seems less powerful, it could be due to dirty components.
- Unusual Noises: Rattling or buzzing noises can signal that debris is affecting the unit’s operation.
- Visible Dust or Mold: If you can see dust on the vents or signs of mold around the unit, it’s time for a thorough cleaning.
- Unpleasant Odors: Musty smells when the unit is running indicate that it’s time to clean the filters and inspect for mold.
Preparing for Cleaning
Before you start, it’s important to prepare to ensure safety and effectiveness:
Safety First
- Always unplug the unit before attempting any cleaning to prevent electrical shocks.
- Wear protective gloves and a mask if you’re dealing with mold.
Tools and Materials Needed
Gather all the necessary tools and cleaning supplies before you start:
- Screwdriver (for accessing certain parts of the unit)
- Gentle cleaning solutions or soaps
- Soft cloths or sponges
- Vacuum with a brush attachment (for dust and debris)
- A bucket of warm water
Readying the Area
- Make sure the area around both the indoor and outdoor units is clear of any obstructions to easily access all parts of the AC.
- Lay down a cloth or plastic sheet to catch any drips during the cleaning process.
In the following sections, we’ll dive into the step-by-step cleaning guide for both the indoor and outdoor components, ensuring you can maintain your mini-split AC in top condition.
Step-by-Step Cleaning Guide

Maintaining the cleanliness of your mini-split AC is crucial for its efficiency and longevity. Follow these detailed steps to ensure a thorough cleaning.
Cleaning the Indoor Unit
Air Filters:
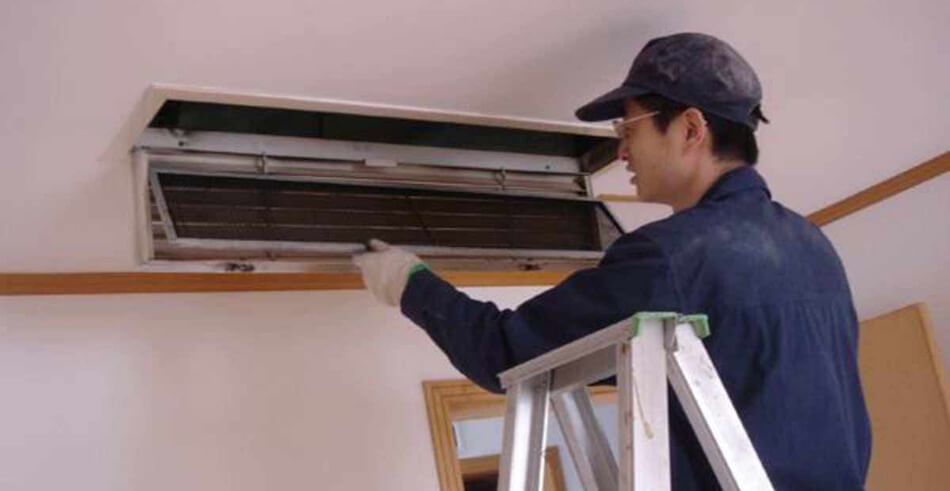
- Remove the Filters: Open the front panel of the indoor unit. Gently take out the air filters.
- Clean the Filters: Use a vacuum to remove dust. For more thorough cleaning, wash them with warm water and a mild detergent. Allow the filters to dry completely before reinstalling.
- Reinstall the Filters: Once dry, place the filters back into the unit and close the panel.
Evaporator Coil:
- Access the Coil: With the filters removed, you should see the evaporator coil. Use a soft brush or cloth to gently dust off the coil.
- Apply Coil Cleaner: For deeper cleaning, use a foam cleaner designed for AC coils. Follow the product’s instructions carefully.
- Wipe Clean: After applying the cleaner, wipe the coil with a soft, damp cloth.
Condensate Drain:
- Locate the Drain Line: Find the drain line at the bottom of the indoor unit.
- Check for Clogs: Use a vacuum to clear any blockage from the drain line. For tougher clogs, gently use a plumber’s snake.
- Clean the Drain Pan: Wipe the drain pan with a mixture of water and vinegar to prevent mold growth.
Exterior and Remote Control:
- Wipe Down the Unit: Using a soft cloth, gently clean the exterior of the indoor unit.
- Clean the Remote: Disinfect the remote control with wipes or a cloth dampened with a mild cleaner.
Cleaning the Outdoor Unit
Let’s take a look at a video for reference
Clearing Debris:
- Remove Obstructions: Ensure there are at least 2 feet of clearance around the outdoor unit. Remove any leaves, dirt, or debris that could block airflow.
Condenser Coil and Fan:
- Turn Off Power: Ensure the unit is disconnected from power for safety.
- Clean the Coil: Use a garden hose to gently rinse the condenser coil from the outside, removing dirt and debris. Avoid using high pressure, which can bend the fins.
- Clean the Fan: Remove the top grille (using a screwdriver) to access the fan. Clean it with a soft brush or cloth.
Inspect for Damage:
- Check for Wear: Inspect the unit for any signs of wear or damage. If you notice anything concerning, contact a professional for further inspection.
Reassemble and Test:
- Reassemble the Unit: If you’ve removed any parts, carefully put them back together.
- Power On: Turn the power back on and monitor the unit for any unusual noises or smells.
When to Call a Professional
While regular maintenance can be handled by most homeowners, there are situations where a professional’s touch is indispensable. Here’s when you should reach out to a professional:
Deep Cleaning Refrigerant Coils: If you suspect the refrigerant coils inside the outdoor unit are dirty beyond a simple rinse, professional cleaning is necessary to avoid damage.
Electrical Issues: Any signs of electrical problems, such as the unit not turning on, frequent breaker trips, or flickering displays, require a professional evaluation.
Refilling Refrigerant: If your AC is not cooling as it should and you suspect a refrigerant leak or low levels, you need a licensed technician to handle the refill and repair, as this involves handling hazardous materials.
Annual Inspections: Even without obvious issues, having a professional inspect and service your unit annually ensures it operates efficiently and can prevent future problems.
Preventive Measures
To minimize the need for repairs and ensure your mini-split AC runs efficiently, adopt these preventive measures:
Minimize Dust and Debris: Regularly clean the areas around both the indoor and outdoor units to reduce the amount of dust and debris that can enter the system.
Routine Cleaning: Set a schedule for cleaning the air filters, exterior, and other accessible parts every few months to maintain air quality and efficiency.
Professional Check-Ups: Beyond DIY maintenance, schedule an annual check-up with a certified HVAC technician to ensure all components are in good condition and to address any potential issues early.
Conclusion
Maintaining your mini-split AC unit doesn’t just improve its efficiency and extend its lifespan; it also ensures you enjoy a comfortable, healthy living environment. By following the step-by-step cleaning guide and recognizing when to call in the professionals, you can keep your mini-split system running smoothly for years to come. Remember, preventative maintenance is key to avoiding costly repairs and ensuring your unit performs at its best. Take the time to clean regularly and don’t hesitate to consult with professionals for deeper maintenance needs. Your mini-split AC is an investment in your comfort—treat it well, and it will continue to provide you with cool, clean air no matter the season.

FAQ Section
In this section, we’ll address some frequently asked questions about cleaning and maintaining your mini-split air conditioning unit. This should help clarify any uncertainties and provide quick, accessible advice.
How often should I clean my mini-split AC filters?
Cleaning the air filters every month is recommended to maintain air quality and efficiency. If you live in a dusty area or have pets, you might need to clean the filters more frequently.
Can I use any cleaner on the coils?
It’s important to use a foam cleaner specifically designed for AC coils. These cleaners are formulated to remove dirt and buildup without damaging the coils. Always follow the instructions on the cleaner for the best results.
What are the signs of a refrigerant leak?
Signs include reduced cooling efficiency, ice buildup on the refrigerant lines, and hissing noises from the outdoor unit. Refrigerant leaks require immediate professional attention.
How do I know if my condensate drain is blocked?
A blocked condensate drain can lead to water leakage inside your home and increased humidity levels. If you notice these symptoms or see water buildup in the drain pan, it’s time to clean the drain line.
Is it necessary to cover the outdoor unit during winter?
Covering the outdoor unit can protect it from debris and extreme weather conditions. However, ensure the cover is breathable to prevent moisture buildup, which could lead to corrosion or mold growth.
Can I perform all maintenance tasks myself?
While many maintenance tasks, such as cleaning filters and exterior components, are DIY-friendly, tasks involving electrical components, refrigerant, or deep internal cleaning should be left to professionals to avoid injury or damage to your unit.
When should I replace my mini-split AC?
Consider replacement if your unit is over 10-15 years old, frequently needs repairs, or is significantly less efficient than newer models. Upgrading can save money on energy bills and repairs in the long run.
If you want to know more, please click below:
- Grilles, Registers & Diffusers – The Ultimate Guide
- HVAC Linear Slot Diffusers – The Ultimate Guide
- HVAC Egg Crate Diffuser – The Ultimate Guide
- HVAC Jet Nozzle Diffuser – The Ultimate Guide
- HVAC Linear Bar Grilles – The Ultimate Guide
- HVAC Air Swirl Diffusers – The Ultimate Guide
- HVAC Round Ceiling Diffusers – The Ultimate Guide
- Round Ceiling Diffusers – The Ultimate Guide
- Exhaust Air Louver – The Ultimate Guide
- HVAC Registers – The Ultimate Guide


